

Introduction
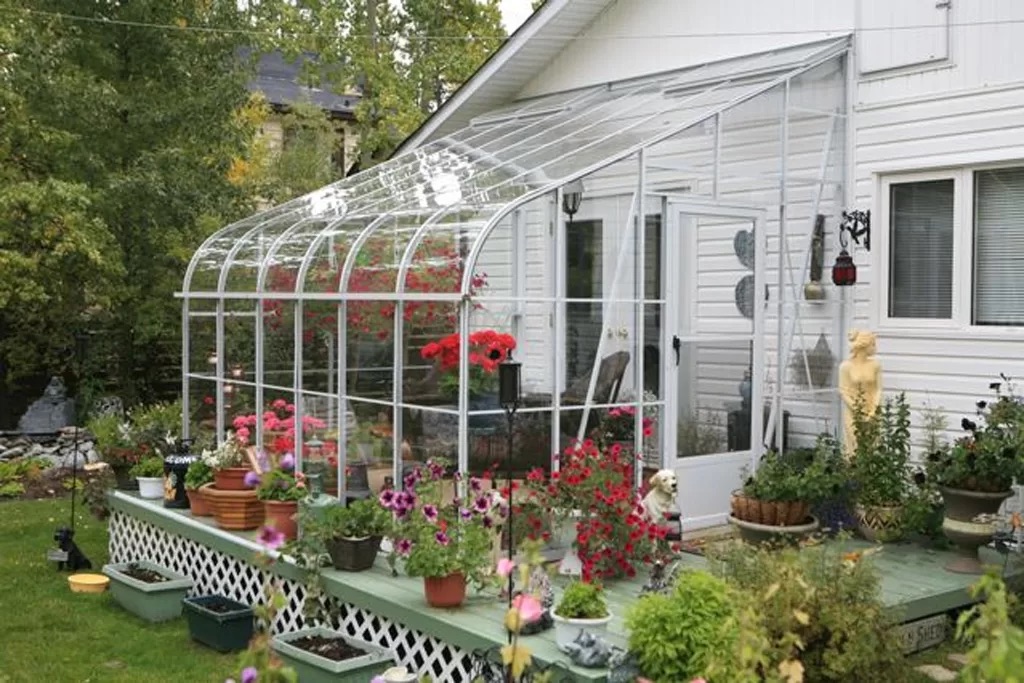
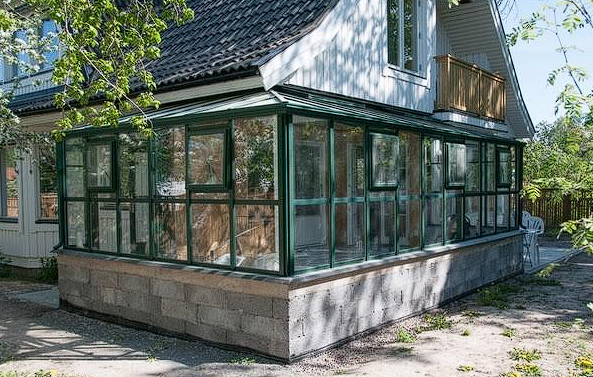
Imagine walking from your house directly into a greenhouse that doubles as a sunroom. Attaching a lean-to greenhouse to your home is a fantastic way to turn your garden space into an added living space.
Buying and installing an attached lean-to greenhouse is one of the most common requests we get. It is a great way to add on to your home in a relatively simple way. We specialize in high-quality BC Greenhouses, offering a standard 5/12 pitch roof, or custom pitch as needed.
People choose an attached lean-to when wanting to:
- Fit a greenhouse in their yard efficiently, utilizing little wasted space.
- Walk directly from their home into a green oasis.
- Use the insulating ability of the home as the biggest wall.
To build a beautifully and functionally designed lean-to the Monarch way, plan on an all-in build of at least $20,000 for a smaller 6 ft x 10 ft structure.
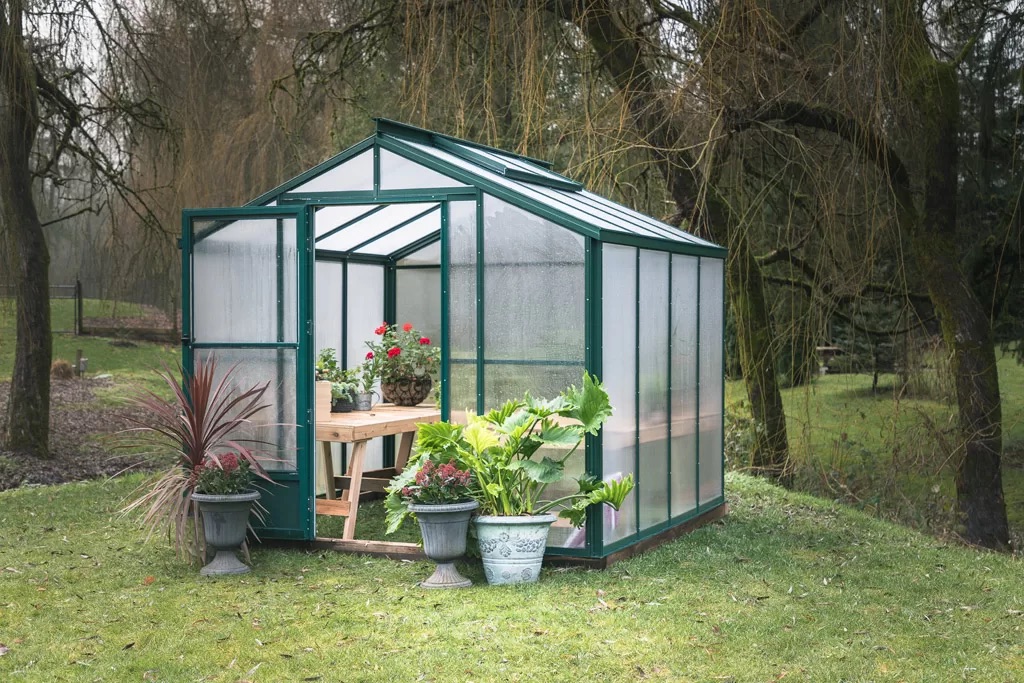
What is a Lean-to Greenhouse?
Imagine cutting a gable (A-frame style) greenhouse directly down the middle and attaching one half to your home. The ridge of the greenhouse is attached to the home, and the roof slopes away to the opposing greenhouse wall.
A huge benefit of this design is insulation. Since the north wall of freestanding greenhouses often uses glazing that doesn’t need the solar gain of south-facing walls, attaching the greenhouse allows you to use your fully insulated home wall as the biggest and most insulated surface, which saves on heating costs.
Key Benefits and Considerations
There are, of course, upsides and downsides to a lean-to design.
Pros
- Save Space: This is an efficient way to put a greenhouse on your property.
- Insulation: No heat is escaping easily through the north wall, which saves on heating costs.
- Utility Access: This is generally the cheapest and easiest way to access utilities for your greenhouse.
Cons
- Condensation Control: Greenhouses are wet environments. Your home’s materials must be considered, as they will be exposed to more moisture. Good greenhouses are engineered for evacuating condensation by way of frame design, and proper airflow and heat are essential.
- Permitting Risk: Attaching to the home always carries a little more risk of not getting permitted, depending on your local jurisdiction.
Average All-in Cost Overview
The starting prices for greenhouses always consider framing and glazing (the siding). However, these base prices do not account for shipping, system upgrades, foundations, and installation.
Here is a quick rundown to fully grasp how to understand all-in costs:
- Shipping usually ranges between $1,500 (7ft x 10ft) and $3,000 (20ft x 40ft)
- System Upgrades like exhaust fans, heaters, extra vents, and automation typically cost more than expected. Automation is highly recommended and can cost between $3,000 and $10,000, depending on the size and control desired.
- Foundations can range from simple wood on gravel for a couple thousand dollars, to extreme Insulated Concrete Form (ICF) concrete foundations for $10,000 or more.
- Installation is typically a bit over half of what you spend on everything else. A $30,000 greenhouse can be quoted easily at $15,000 for installation.
Example Project Estimates (Kit + Installation):
| Size | Glazing Option | Estimated All-in Price | Context |
|---|---|---|---|
| 6 ft x 10 ft | Base Configuration | $20,000+ | Minimum all-in cost |
| 14 ft x 18 ft | 6mm Tempered Glass, Full Environmental Controls | ~$67,000 | Includes construction of a doorway into the living room |
| 12’8.5″ x 16’9.5″ | Insulated Double-Pane Glass | ~$103,000 | (~$78k kit + $25k install) Includes high snow-load engineering allowance |
| 20’8.5″ x 39’3″ | 5-wall Polycarbonate roof/endwalls, Double-pane Glass sidewall | ~$134,600 | (~$110k kit + $25k install) Large project, includes heater and exhaust fan package |
Factors that Affect Cost
Size and Materials (Glazing)
Cost scales pretty evenly with size and materials, with some minor savings per square foot for larger greenhouses, mostly in installation costs.
Glazing type heavily affects price. Double-pane glass is always the biggest jump. Anytime you can justify polycarbonate on the roof, do this, and spend on glass where it counts.
Popular glazing options include:
- 16mm Insulated Double-Pane Tempered Glass: High R-Value (2.04) and very high light transmission (90%). This is recommended for shaded areas to maximize solar gain.
- 16mm Five-wall Polycarbonate: Highest R-Value (3.0) and lower light transmission (62%) (diffused light).
- 6mm Twin-wall Polycarbonate: A popular, standard option.
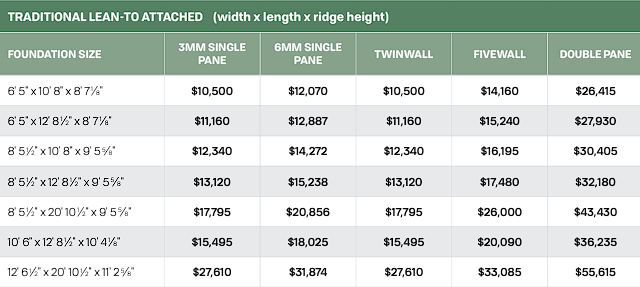
See some common sizes and glazing options below. This is the frame and glazing cost.
Foundations
Foundations can be as simple as wood on gravel or as thorough as ICF concrete foundations. Concrete may not be as necessary as you think, as you can bury thermal barriers for cheaper.
- Knee Walls: A raised concrete knee wall is often recommended for sites with high snow shedding or drifting, as it creates a stronger base to prevent snow piles from pressing directly against the glazing. A stone veneer can be added to match the home, which typically costs $10,000–$15,000 for the wall and veneer.
- Insulation: While ICF concrete offers high insulation, it can lead to a less precise finish for exterior veneer and potentially trap moisture. To achieve a clean finish while maintaining thermal performance, we recommend a standard foundation with a thermal break of 4 inches of rigid foam installed on the interior of the foundation wall, especially when using radiant floor heating.
Climate Control Systems and Utilities
System upgrades like exhaust fans, heaters, and extra vents typically cost more than expected.
- Airflow and Condensation: Horizontal airflow fans are highly recommended to reduce condensation buildup. The Ground to Air Heat Transfer (GAHT) system is used with your heating system and does not contribute to cooling.
- Electrical/Plumbing: Utility access is easy with a lean-to. While our quote does not automatically include utilities, we can sub-contract to an electrician and plumber if you’d like us to manage the process.
Attachment and Permitting
Attaching to your home takes commitment and strong planning to ensure the greenhouse fits the correct spot, as missing the mark can be a costly mistake. Usually, a wood board is mounted to your home, and the greenhouse is mounted to that.
- Engineering and Custom Size: Cost can be increased significantly by custom sizing and the need for snowload requirements with engineering. We recommend stamped drawings to cover all bases for high snowload areas, which can add about $2,750.
- Door Type: The door type can impact the cost and function. An inswing door is generally not recommended as it can bring water into the greenhouse and may require an upgrade to a storefront door. However, inswing doors may be necessary in areas with heavy snow to avoid getting trapped.
- Complex attachments, such as a 90-degree wrap-around (hip-style enclosure), are possible but can add a significant cost, such as $15,000 for the hipped roof.
Conclusion
Investing in a well-planned budget to integrate your greenhouse with your home is a valuable step. By incorporating the right automation to ensure a comfortable growing environment, you create a seamless and functional addition to your living space. We encourage you to review the cost estimates provided and contact us for a formal quote to secure precise pricing for your project.
Learn More: